With all the excitement of finally getting my passport approved, I wanted a little cover for it for some added protection from the purse gremlins. Since I leave is just a short time
eep! I looked in many stores and couldn't find any I liked and online would have taken too long. So what else is there to do then break out the craft supplies and take matters into my own hands. Plus it's more fun this way, and cheaper ;o)
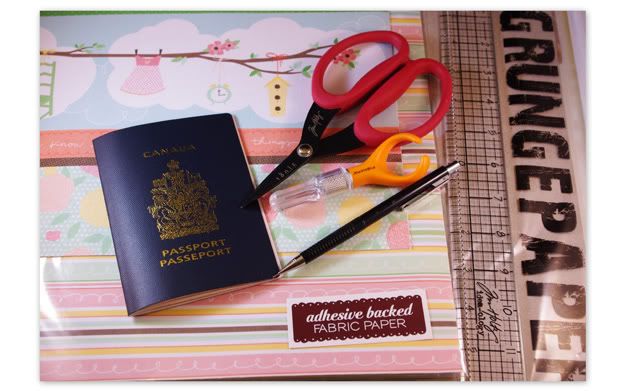
Here's what you'll need:
Not shown:
sewing machine with matching thread
embellishments if desired
Note: If you don't have access to Grunge Paper or Fabric Paper do not worry. You can replace the grunge paper with chipboard or an old cereal box and use some scrap fabric and spray adhesive to make it stick to the chipboard to replace the Fabric Paper.
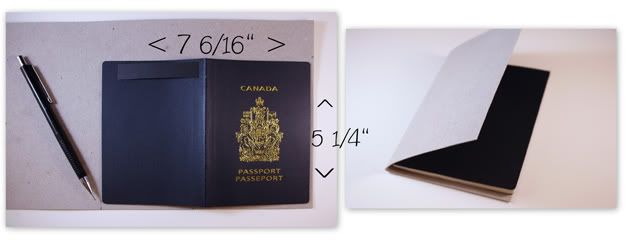
Okay, to start you will want to lay your passport open and mark the height and length on the chipboard giving a seam allowance on the edges. Cut out and fold in half. I like to fold it with the passport inside because the passport is a little thick and it's pages might over extend on the sides. My measurements are 5 1/4" x 7 6/16". Don't be afraid to adjust the measurements to your needs/desire.
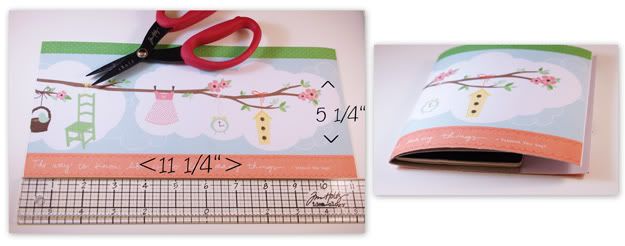
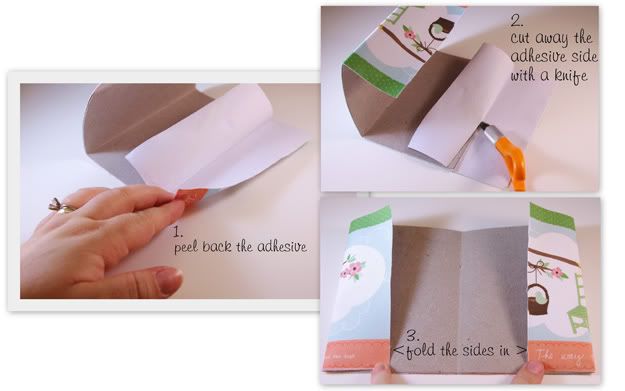
Next is to use the chipboard as a guide and measure your fabric to the same height and add approximately 2 inches to either side for the inner flaps and cut out. My measurements are 5 1/4" x 11 1/4". Fold in half again in the center folding with the passport and the chipboard to get even coverage. Peel back the adhesive and place the chipboard matching the center fold lines.
You can use your ruler or a bone folder to press the chipboard and sticky back together for added pressure. (If you do not have adhesive backed fabric, you would spray the backside of the chipboard and stick the fabric to the chipboard and let dry for the amount recommended on the spray adhesive instructions)
Now with the Dear Lizzy fabric paper you can peel away the sticky back from the fabric leaving just the fabric. Do this on either sides until you reach the chipboard edges. Then use an exacter or scissors and carefully slice/cut away the peeled adhesive leaving the fabric flap.
It's sewing time :D
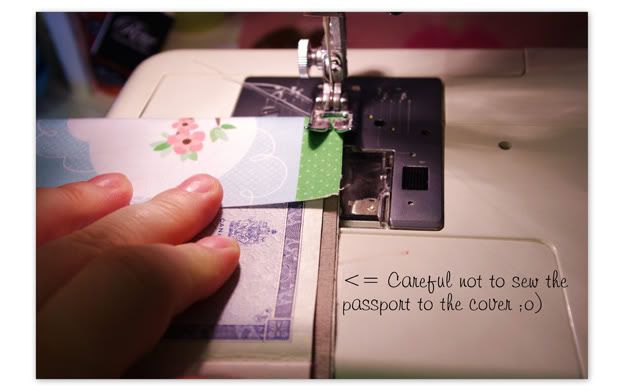
Sew along the top and bottom of the cover back stitching the beginning and end stitches and you are done :o)
VERY IMPORTANT: Sew as close to the edge as you can otherwise there won't be enough room for the passport flaps to fit inside. Yes, experience is talking here.
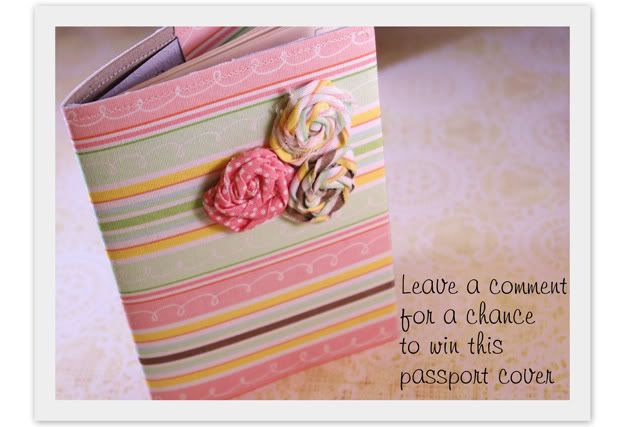
You can embellish if you would like or you can leave it as is. On the striped one I thought it could use a little something extra so I made some rolled rosettes with some leftover fabric strips and glued them to the cover and the other I added a little flower on the sweet little branch. Just enough to give it something extra yet simple.
I made two but really only need one so leave me a comment about where you would like to travel and I will draw a random winner on Saturday for the striped one with the rosettes.
I hope you enjoy making your custom passport cover.
I'm linking this project
here. Check it out for some awesome inspiration :D
>^..^<