Showing posts with label tutorial. Show all posts

Monday, March 25, 2013

anchors aweigh -an itty mini album tutorial

I read somewhere that anchors are the next up and coming trend which reminds me of the little itty mini album I created for Scrappy Boutique using the Uncharted Waters Product Sampler kit. I absolutely love this kit. The extras are super fun and the papers were so easy to work with. If you want to see all the comes in the kit just check out their video of all of the contents.  
Now let's go make a mini album shall we?
First thing’s first is gathering your supplies.
            -album cover paper cut to 5 ½ x 12
            -3 papers cut to 5 x 7
            -embellishments of choice
            -adhesive of choice
            -scissors
            -bone folder (or a ruler works just as well)
            -score pad (or paper trimmer used for scoring)
           - sewing machine (don't worry if you don't have one, I'll show an alternative as well)

Next is to fold the 5x7 paper in half and set aside for a moment. Then score the 5 1/2 x 12 cover paper at 2 1/2", 6 1/4", 6 1/2" and again at 10 1/4" then fold on the score lines.
For the larger front pocket snip the corner off and then glue the bottom edge of the front pocket and the top and bottom edge of the back pocket.
Now off to the sewing machine we go.  
Assemble the 5x7 papers in the order you want and line them adding the Glassine baggie (if you are using the Product Sampler kit) and then sewing down the middle. 
If you do not have a sewing machine you can also hole punch the center and use ribbon to bind it together. Now that your album is all assembled it's time to add your personal touch with embellishments of your choice. 

I was afraid of my keepsakes falling out of the little baggie so I punched out two small flowers and used brads to attach them for the twine to wrap around. 

It’s itty and it’s mini but it can hold quite a bit. I hope you had fun making this little itty and please post a link in the comments to your creations so we all can see and oogle and ahhh over them.

Wednesday, February 9, 2011

tic tac toe

And now the project:

As promised here is the project that developed from the Hugs and Ki**'s layout. At first I was satisfied with just a scrapbook page but then the more I looked at the photos the more I was inspired to make a custom tic tac toe game the whole family can enjoy on game night.

Here's what you'll need to make one of your own:
  • 2-6x12in piece of chip board or a cereal box (I used Tim Holtz grungeboard found at Michaels-remember to use a coupon)
  • 6-2x2in photos cropped to fit 4x6 photo printed twice (for a total of 12 little photos)
  • 1-12x12in sheet of pretty paper
  • acrylic paint in the colour of your choice
  • paper trimmer
  • scissors
  • modge podge 
  • 2-sponge applicators (one for painting and one for the modge podge)
  • don't forget your lovely smile ;-)

The first thing is to cut the chipboard (not "chopboard" lol) into12- 2x21/4 inch squares. Then trim the photos into 1/8 inch smaller then 2x2 inch squares and set aside. This will give a nice little border which makes it easy when sealing it with the modge podge later.
I had our Stinky Winky help me with this part as she loves to paint everything when given the chance. :D Just paint one side of the chipboard squares and set aside to dry. As you can see you won't need to paint the entire square as your photo will cover most of it.
**Unless your name is Maribel, which then you just can't help yourself and MUST paint the entire square, and fingers, and table, and anything else that needs a little colour.**
While the paint is drying cut your pretty paper the same size of the chipboard in the same amount. This will be the backside of the playing pieces.
Alrighty so the paint should be dry now so you get to get all sticky with the modge podge. Start with glueing the pretty paper squares to the backside of the chipboard pieces, then flip them over and glue the photos to the painted side. Once you have everything all glued together just run a smooth coat of modge podge over the front and back giving ample time to dry on each and there you have it! Your custom tic tac toe game.
As for the game board you can use anything to make the grid. Ribbon, chalk, chopsticks, regular sticks, etc. I like to use the chalkboard cookie sheet that a friend inspired me to try sometime back. It works great.

Maribel sort of gets the object of the game but ends up playing it her own way. She's always "X" while we have to play the "O" but that's okay, X's are kisses and she gives the best little kisses.
xoxo

>^..^<

Saturday, February 5, 2011

a frame of mind

I shared this tutorial at Skrap 'n Chat during our 2nd birthday crop last weekend and was so delighted to see so many beautiful frames come from it that I just had to share here too. :D
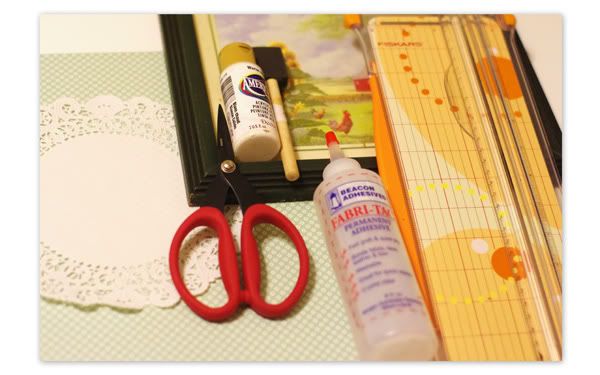
Here's what you'll need...
  • an old frame with the glass
  • acrylic paint and brush (optional if you like your frame as is)
  • scissors
  • paper trimmer
  • glue
  • pretty paper
  • any flat embellishments like rub ons, flowers, anything that will fit under the glass with relative ease (I used a paper doily for simplicity)
  • ruler (not pictured-oops)
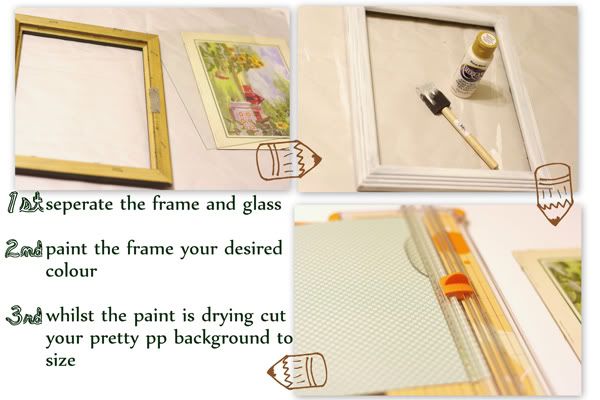
First thing you will want to do is remove the glass and backing from the frame and paint. Mine took two coats because of the dark wood and made sure to let it dry completely before adding the additional coat.

After the paint is dry and the background paper is cut, decorate and embellish to your heart's content. I kept mine simple because I really liked the October Afternoon paper. Simple yet elegant.
Put the frame back together and voila!
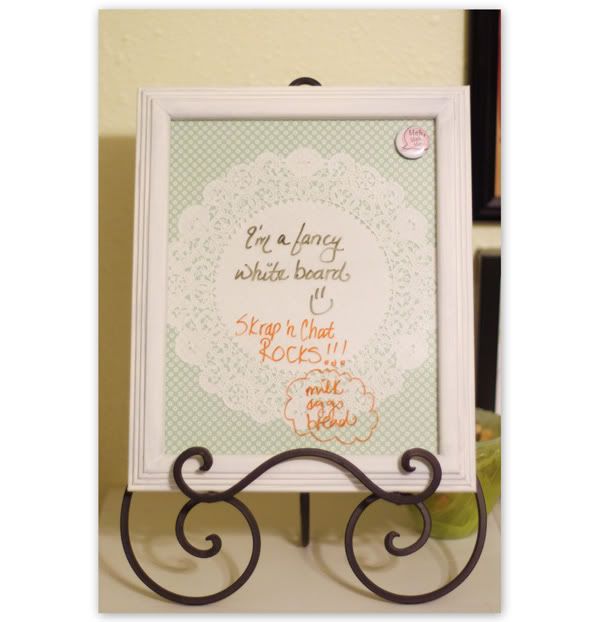
Now you have a fancy new dry erase board to keep track of all those thoughts and notes. My memory is a sieve so I take all the help I can get as my youth has begun to catch up with me. I have to say, though, it is very satisfying to use materials already on hand and also very rewarding.

This particular one is on it's way to a new home. Where it's going I cannot say....but it's cold there. ;o)

>^..^<

Tuesday, December 7, 2010

no peeking

Have you ever snooped for presents only to find out they weren't yours? That happened to me one year. I snooped in my parents closet and found all these fun toys and dropped hints to my parents with little sayings like, "Gee I sure would like a guitar for Christmas." and "Oh wouldn't a Popple be fun to play with right about now?" Well Christmas morning came and guess who DIDN'T get a guitar or a Popple? That's right, me. Guess who DID get a guitar and a Popple? Yeh, my sister. That was the first, and last time I snooped for presents. Plus it takes away the surprise come Christmas morning.

Well, in my family we have a Snooper McSnoopersten and this year I discovered a way to keep her/him (but we all know who it is...) guessing. With scratch off tags. I used this technique at Skrap n' Chat but thought it too good to not share here as well.

For this project you will need dish soap, dixie cups or disposable cups of any sort, a craft measuring spoon, silver acrylic paint, paint brush, scissors, tape (to keep the laminate from curling) and stamps which are totally optional.
You won't need that much dish soap but it's the only bottle I had to photograph. I also forgot to add the scissors in the picture too. Ooo and you can pick up the Peel and Stick Clear Laminate at your local Wal-Mart for a couple dollars.
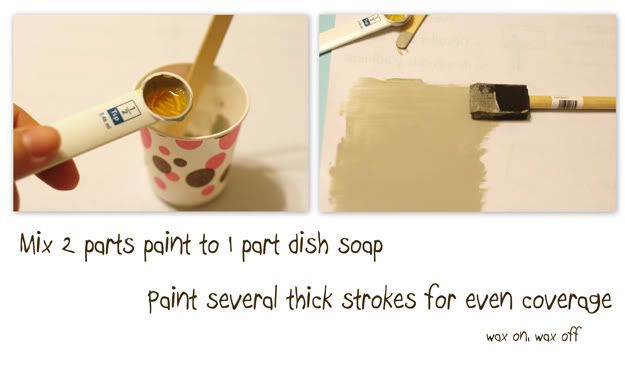
You will want to mix two parts paint with one part dishsoap and stir but be careful not to make any bubbles. It likes to do that if you go a little stir crazy. yuk yuk. *wiping tear from eye* Anywho, cut out a piece of the Laminate and tape down the corners so it doesn't curl on you, then paint several nice thick strokes of the soapy paint coctail and set aside. You can repeat with other paint colours if you would like.

As you can see above how much the paint mixture covers a 12x12 sheet of laminate contact paper. You will want to let it dry completely before doing anything else with it. I advise at least 4 hours to ensure it is dry all the way through. You could set it in front of a fan to speed up the drying time.
This would be a great time to make and write out your tags. Just make sure you know who's tags are for whom when you attach it to the gift or Betty Lou might get Anna's gift while Joe got Maribel's if you know what I mean. ;o)
Once it's completely dry you can stamp and write on the painted surface as you wish and cut it out. Then when you have your tags all ready just peel off the backing and stick away. I couldn't help but make a few extras just to scratch off the paint. Hee hee.

Have a wonderful day and remember, no peeking now!

>^..^<

Tuesday, October 26, 2010

incognito

Need a quick costume? How 'bout going incognito?

I already have a little complex about my upper lip as Maribel likes to draw me with a stache and my eyebrow waxing ladies continue to ask me if I'm sure I only want to wax my brows and nothing else. I still don't see it but maybe people will start to notice now...

Here's what you need:
Note: If you do not want to use the fake fur or cannot find any, you can use double felt and follow the same instructions.
 To start fold the chipboard (you can also use a cereal box) in half and draw your moustache pattern and cut out. Then trace and cut out the moustache in the felt. This will be the backside of the stache.
Next you will need to repeat the above step with the fur. Make sure you have the fur laying downwards or your stache will look a little wonky. Using fine tipped scissors, cut out the moustache along the backside liner only. Otherwise you will end up trimming your moustache hairs and we don't want that. I just fed the scissors and snipped little pieces at a time. When it's all cut out, just stroke the loose hairs away. We're almost done...
Now we will need to glue the bamboo skewer to the backside of the felted moustache. Be generous and also make sure you glue the pointy end so you don't end up poking yourself or someone with the stick. Then continue with the glue and attach the furry stach to the felted stache.
Other option: You could just keep it as a felted moustache and cut out two felted moustache outlines and be done.

Grooming:
Now as you can see if it's left as is, your moustache will be a little on the fuzzy side. To tame the wild beast just add a few spritz of some hairspray to groom it to your liking and voila! You are all set a la debonair style.
  
Even Mr. Milo looks spiffy and dashing with his new fuzzy lip. Although, I guess when you think about it, he already has a fuzzy upper lip... hee hee 

I originally saw the moustache on a stick on MS a couple years ago and I'm linking this tutorial HERE. Check it out for some awesome inspiration!!
>^..^<

Monday, October 25, 2010

broomsticks in hand

stirring stirring witches brew
Ooo Ooo Ooo Ooo
1 step, 2 step, 3 step,
BOO!
Did I scare ya? Ah well, I tried. Since Halloween is right around the corner I thought I would make some fun and spooky treats for little M's lunch.
To start you'll need a fruit rollup, pretzel sticks and scissors.
Carefully unwrap the fruit roll up and cut it into 3x2 inch squares. Then cut a few fringes and roll the pretzel and the fruit rollup together and you're done. If you want a few more bristles to the broom you can snip away. That's it. Easy peasy.

I gave one to Joe and his only comment was "Interesting combination." It's perfect for a kiddo's pallet.
Happy Monday!

>^..^<

Tuesday, August 31, 2010

Dear Lizzy passport cover

With all the excitement of finally getting my passport approved, I wanted a little cover for it for some added protection from the purse gremlins. Since I leave is just a short time eep! I looked in many stores and couldn't find any I liked and online would  have taken too long. So what else is there to do then break out the craft supplies and take matters into my own hands. Plus it's more fun this way, and cheaper ;o)

Here's what you'll need:
Not shown:
sewing machine with matching thread
embellishments if desired

Note: If you don't  have access to Grunge Paper or Fabric Paper do not worry. You can replace the grunge paper with chipboard or an old cereal box and use some scrap fabric and spray adhesive to make it stick to the chipboard to replace the Fabric Paper.
Okay, to start you will want to lay your passport open and mark the height and length on the chipboard giving a seam allowance on the edges. Cut out and fold in half. I like to fold it with the passport inside because the passport is a little thick and it's pages might over extend on the sides. My measurements are 5 1/4" x 7 6/16". Don't be afraid to adjust the measurements to your needs/desire.
Next is to use the chipboard as a guide and measure your fabric to the same height and add approximately 2 inches to either side for the inner flaps and cut out. My measurements are 5 1/4" x 11 1/4". Fold in half again in the center folding with the passport and the chipboard to get even coverage. Peel back the adhesive and place the chipboard matching the center fold lines.
You can use your ruler or a bone folder to press the chipboard and sticky back together for added pressure. (If you do not have adhesive backed fabric, you would spray the backside of the chipboard and stick the fabric to the chipboard and let dry for the amount recommended on the spray adhesive instructions)

Now with the Dear Lizzy fabric paper you can peel away the sticky back from the fabric leaving just the fabric. Do this on either sides until you reach the chipboard edges. Then use an exacter or scissors and carefully slice/cut away the peeled adhesive leaving the fabric flap.
It's sewing time :D
Sew along the top and bottom of the cover back stitching the beginning and end stitches and you are done :o)
VERY IMPORTANT: Sew as close to the edge as you can otherwise there won't be enough room for the passport flaps to fit inside. Yes, experience is talking here.

You can embellish if you would like or you can leave it as is. On the striped one I thought it could use a little something extra so I made some rolled rosettes with some leftover fabric strips and glued them to the cover and the other I added a little flower on the sweet little branch. Just enough to give it something extra yet simple.

I made two but really only need one so leave me a comment about where you would like to travel and I will draw a random winner on Saturday for the striped one with the rosettes.

I hope you enjoy making your custom passport cover.

I'm linking this project here. Check it out for some awesome inspiration :D

>^..^<

Monday, August 9, 2010

alphabet fun and paper dolls

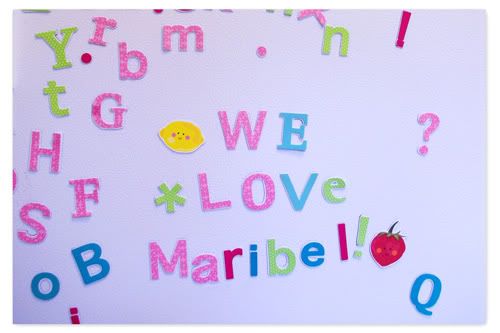
I think every parent has either owned a set as a child or purchased a set for their children. That's right. I'm talking about those plastic alpha magnet sets that never seem to stay as a complete set. So then you get creative like this:
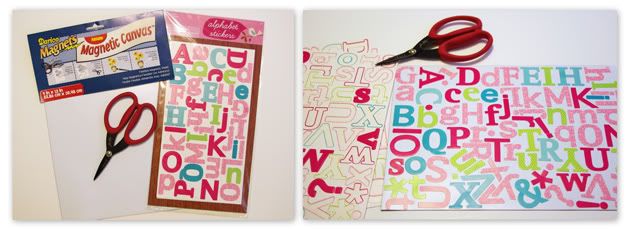
While I was shopping at Target last weekend I picked up some cute alphabet stickers from their dollar spot. I needed more alphas like I needed a hole in my head but they were cute. So I got them. I think buying alphas is a disease. If not, it should be because I have it and have yet to find the cure. Well, here's what I did with the Target ones since I felt so guilty buying more of what I didn't need.
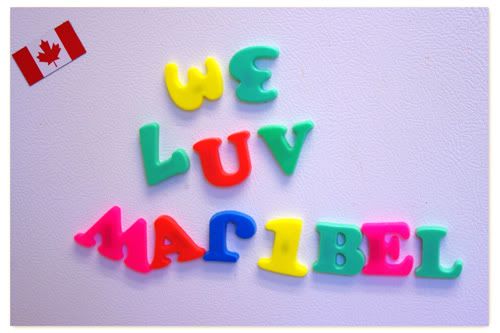
Just stick them on the magnet sheet, cut them out and enjoy.
That's it. Super duper simple! The best part is if you lose a letter it's no big deal. Just grab a replacement from your other alpha sets and you're back in business. You could totally use those lone alphas that never got put onto pages but yet you still hang on to just in case. You know the ones. Ya, those. I will be adding those to the mix as soon as I get another sheet of the magnet canvas. I bought the last few in the store because I knew I wanted to do something else other then alphabets. Paper Dolls.

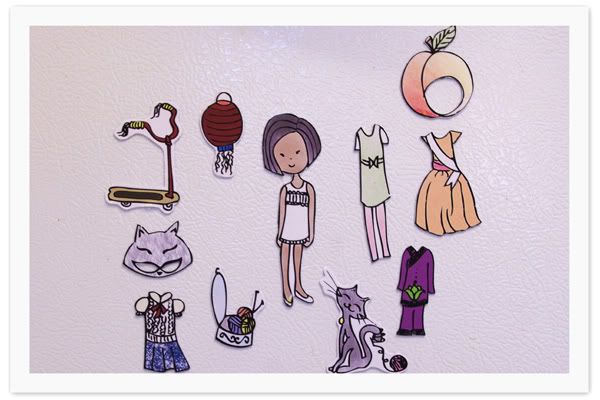
Growing up my mother used to buy me those paper dolls that you punched out the clothes and folded the tabs to keep the outfits in place. I loved those so so much. Thinking about them also make me miss my mom something terrible. When I saw these paper dolls created by April Meeker I knew I had to make them for Maribel.
After printing them on some plain card stock, I ran them through my Xyron to make them super sticky and followed the previous steps to the alphabet magnets.
Now I'm wishing I kept those metal cd cases that aOl had mailed out to everyone years ago. Those would make perfect little storage containers for these dolls and it would make them portable too. Ooo maybe a tin lunch box instead? I'm sure I have one of those laying around...
I hope you enjoy this super easy project.
Happy crafting!!

>^..^<

Tuesday, August 3, 2010

it's a bird, it's a plane, it's...

...SuperMom!!!

Growing up I was conviced that my mom had special powers or something because she always knew what I was up to when I was little. I even asked her one day while we were at a resturant how many fingers I was holding (under the table) and when she guessed right I was amazed and hence forth convinced. I think when we become mothers ourselves we get those 'powers' the moment things go quiet. It's super.

To make your own SuperMom shirt here's what you will need:
I found these shirts at Charlotte Rouse for $3 ea so I bought several doubles of different colours. The thrift store is another great place for cheap jersey knit. I wish I thought of that earlier...oh well. Moving on.
Click on the logo image and save it then print it on reg paper using the 8x10 page layout setting. You do not have to print in colour to save on ink. Black and white will do just fine.

Pin and trace around the logo design making sure that the design is centered on the main shirt. Repeat this step on background knit.

Cut out the outline from the background knit and pin to the other shirt. Sew around the edging and the pattern design.

Cut out several long strips approximately 1 1/2" to 2" wide from the other contrasting colour. (Ribbon could work too) Because I'm using a t shirt I plan on altering, I just used one side of the shirt to make the strips. Good thing I gave up wanting to be a surgeon. Yikes. I see now that a rotary cutter and guide is top on my "To Buy" list. Sew a few strips together to make one long strip. And repeat with the other strips for a total of two long strips.  
To make ruffles stitch along one side with the largest stitch setting on your sewing machine. Pull one thread to gather the fabric. Be careful not to tug too hard or the thread will snap. Tie a knot with the threads on both ends to prevent the ruffles from coming undone. Experience is speaking on this one. Don't worry about running out of ruffle strips. If you do, just make more ruffle strips and overlap them to hide any gaps.

Once you have your pretty ruffle strips, start pinning one along the outline of the design and sew a straight stitch in the center to secure pulling the pins out as you go. Repeat with the other long ruffly strip for the inside 'S'. Snip the loose threads and any extra ruffle and enjoy your new shirt.

Now you can go and conquer the household chores and investigate the silence with your SuperMom skills. ;o)

By the way, in case you ever need to know how to clean up an entire bottle of Baby Powder dumped over carpet and tile, do not use the vacuum what ever you do. It only goes right through the filter and back into the air. Instead, sweep up as much as possible first and then mop up the rest. The nice part is everything will smell so fresh and clean for a few days. Even the cat...

>^..^<