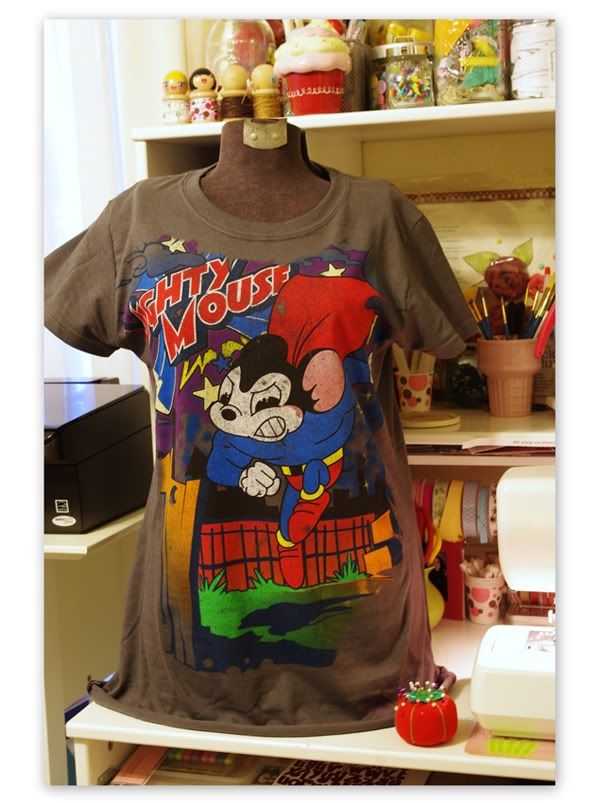
Target was having a wicked sale on graphic tees this weekend and I saw one that I had to have. The only bummer part was that it was 3x’s too big. Nuts. But right as I was about to walk away I thought, “There’s gotta be a way to make it work!” so into my cart it went. :oP
When I got home I slapped in a Wallace and Grommit movie for M baby and went straight to work.
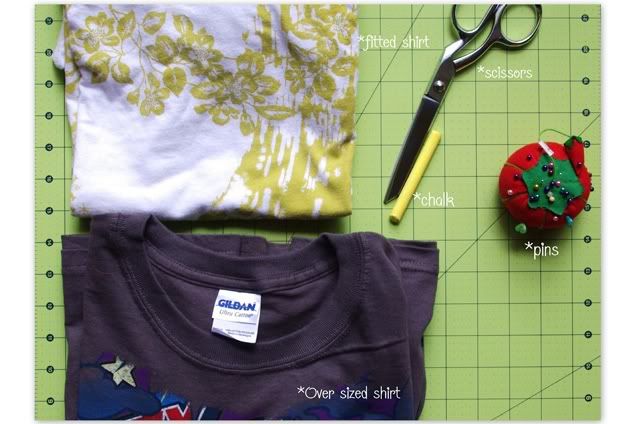
Here’s what you need to resize an oversized shirt. I forgot to photograph the monster sized shirt.Sorry.
Note: make sure that the fitted shirt you use is close to the same material so they stretch the same. Otherwise your new tee will be a little on the snug side. Yes, experience is speaking.
First thing is to lay both shirts flat and centered matching the shoulders smoothing out any wrinkles. Fold the sleeves of the fitted shirt in and trace the outline with a marking pen or chalk. Cut outside the markings for your seam allowance. I gave myself a ¾” seam allowance in this project. Mark the center of the shoulder with either a pin or chalk.
Next part is the sleeves. Take the fitted shirt and the sleeves you just cut off and match up the edge of the sleeves and mark the center of the sleeve. I used my heart pins as my center markings. Trace out the smaller sleeve and cut out leaving a nice seam allowance. Use your freshly cut sleeve as a pattern for the other side.
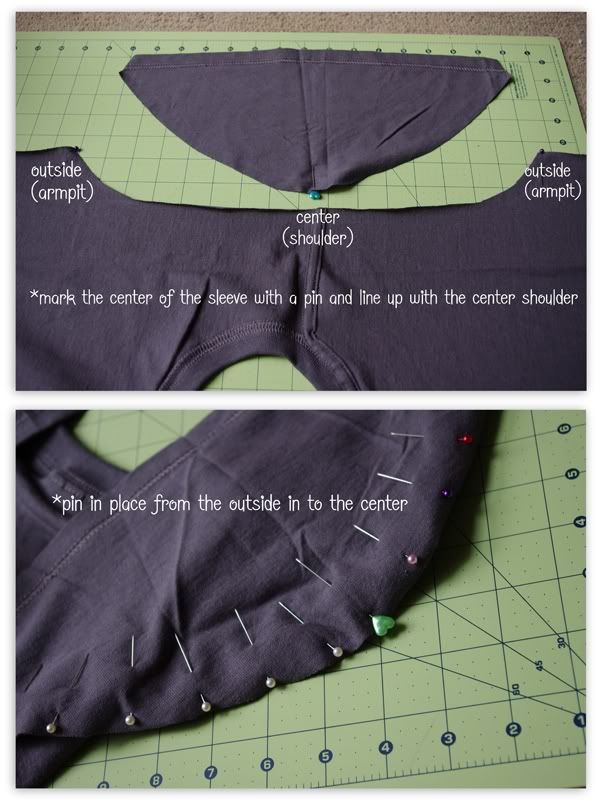
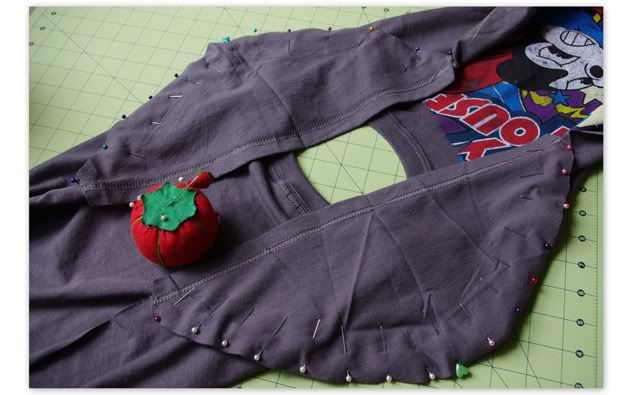
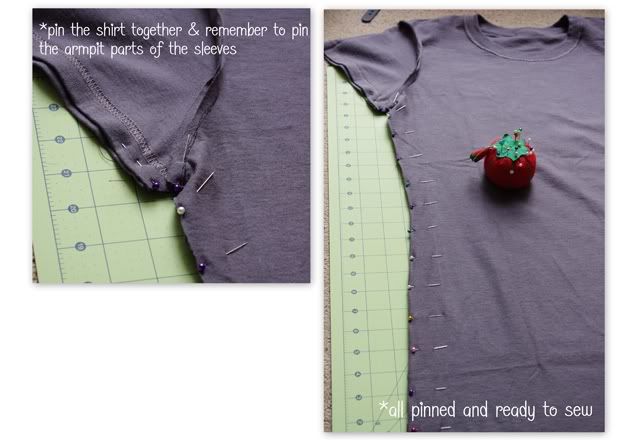
Now comes the pinning and poking. I always poke myself in someway no matter how careful I am. It’s like I’m a magnet or something. Sorry, didn’t mean to go off on a little tangent. Anywho, open up the shirt and line up the center of the sleeve with the center of the shoulder and pin together. Next pin the two ends (outsides) of the sleeve to the armpits of the shirt with the right sides together and continue to pin together from the outside in towards the center. Make sure you don’t stretch your fabric or it will come out a little distorted. Again, experience is talking.
We are getting there!
Now off to the sewing room!!!
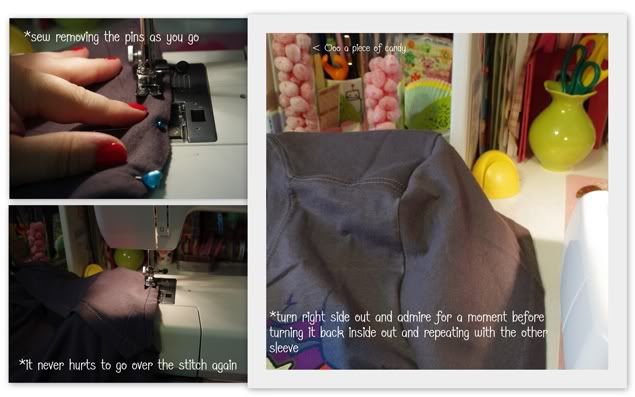
Sew the sleeves removing the pins as you go from one side of the armpit to the other. Back stitch your first and final stitches. I like to go over the freshly sewn seam for that added support. Make sure you don’t sew your shirt together. That’s coming up next and don’t forget to repeat with the other sleeve.
Back to the pinning and poking. Turn the shirt inside out matching the right sides together and pin the sides all the way down. Remember to pin the short under part of the sleeves for the armpits. Hee Hee What a funny word,
armpit. Sorry. I’m tired, can you tell? Anywho, head back to the sewing room and sew up the sides removing the pins as you go. Turn right side out and admire your new shirt!
I like my shirts long so I left the length as it was but now would be the time to trim and hem the bottom to your liking. Slap on your new shirt and rock on or fight crime. Whatever.
I have a goal. It's a shrinking goal if you will. ;0) I realize that I will need to cut back on some
*cough* *coughunhealthycough* habits so this will save me a few bucks as I go through the metamorphosis into the skinny, beautiful me that is hiding inside there. Somewhere.
Happy Sewing!!! Ooo a piece of candy!
>^..^<


5 comments:
Well aren't you Little Miss Amazing! I love your more everyday!
Is there anything you can't do??? hee hee! This is pretty cool and I love your tutorial.
Dood - you rawk!!
What a great idea - can you teach me how to do capri's and shorts as well? You could do mine as an example... I could mail 'em out right now! ;o)
OK,you are way too efficient and clever! You need your own show.
Post a Comment